
11 October, 2011
02 October, 2011
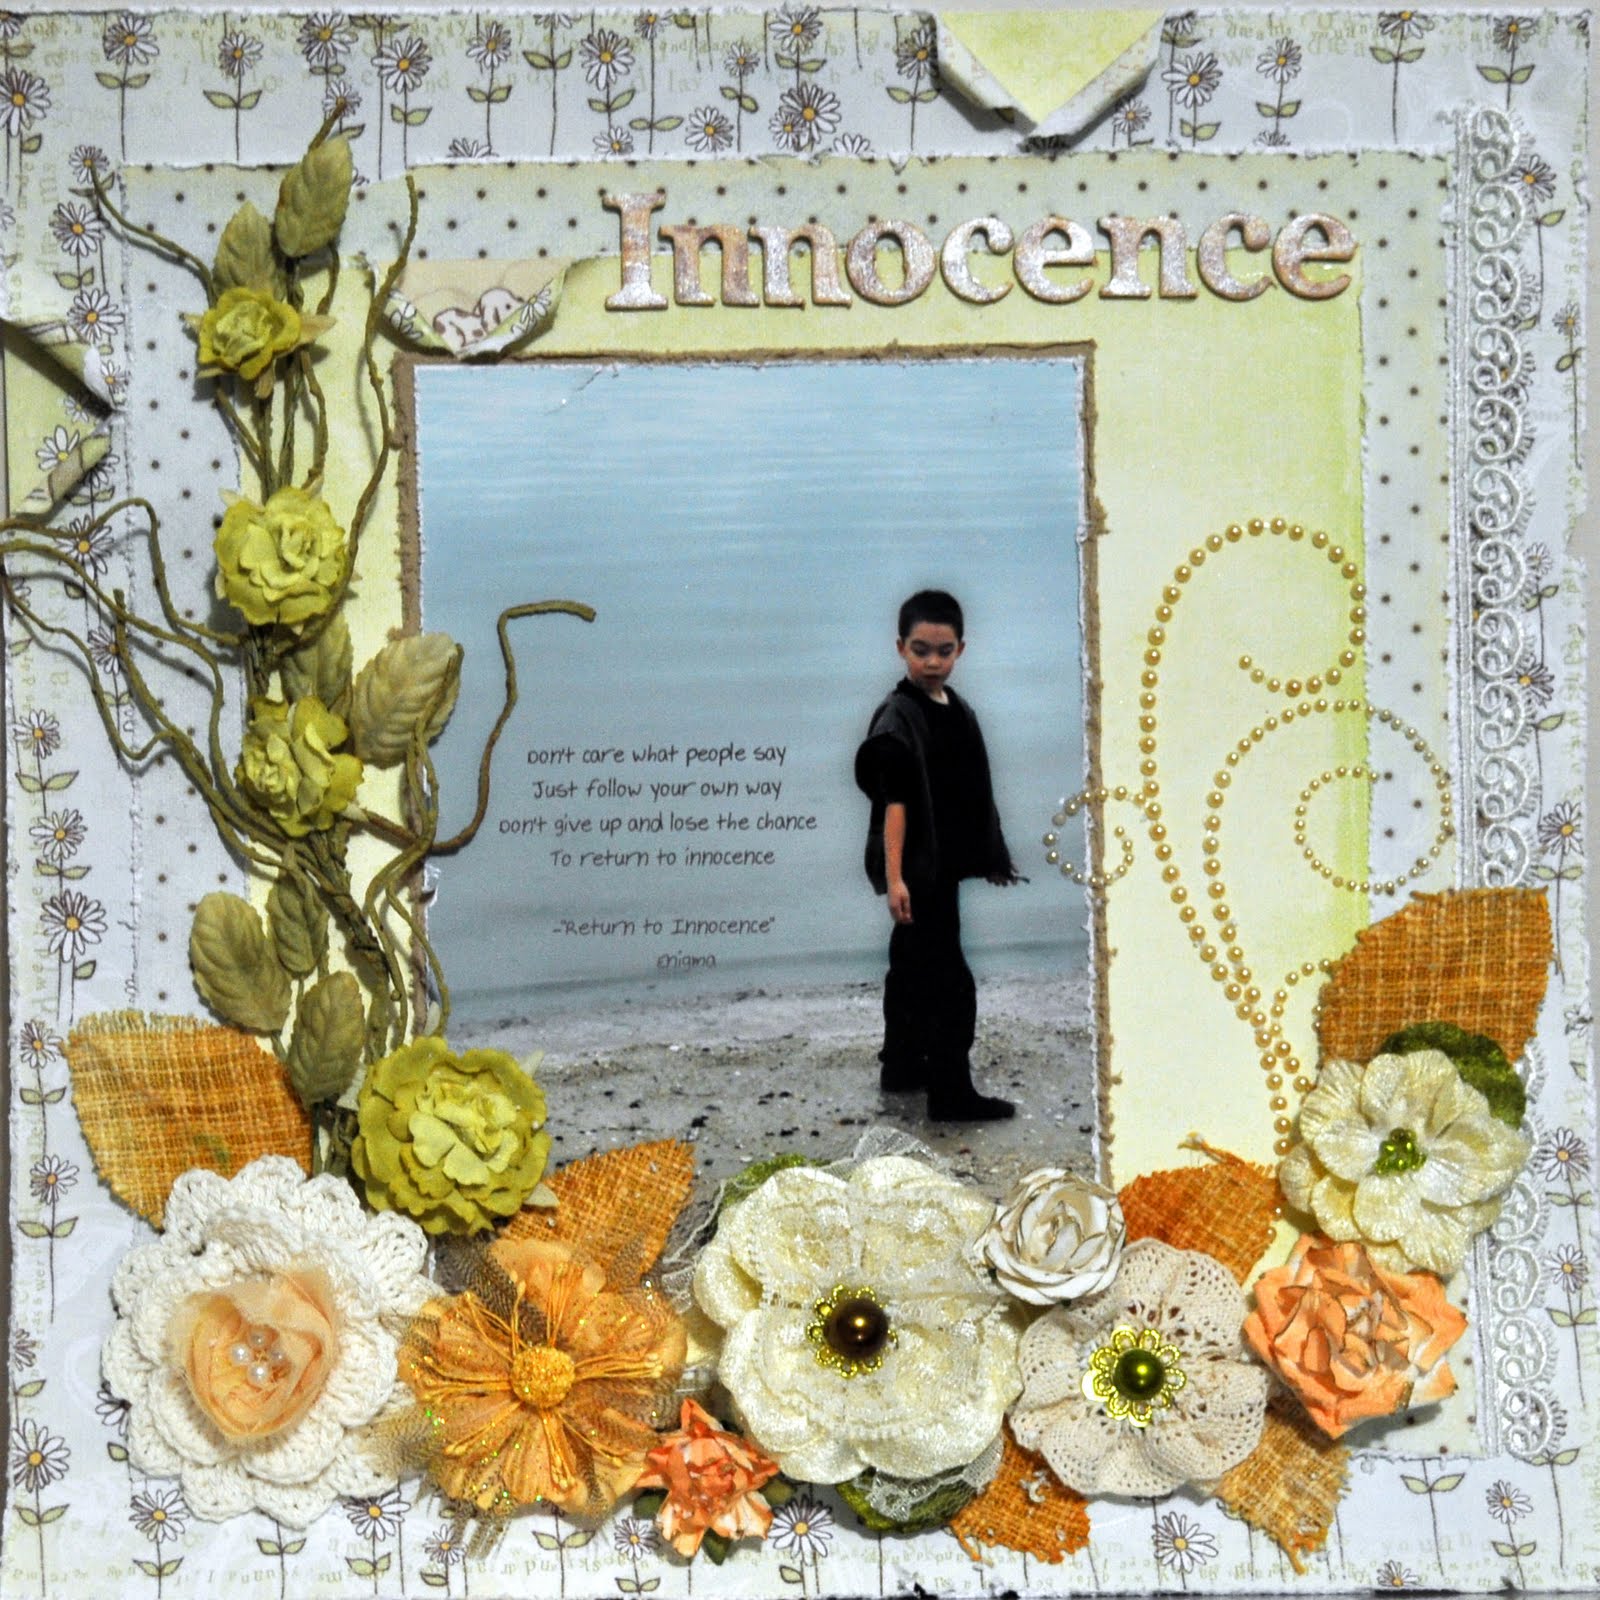
Treasured
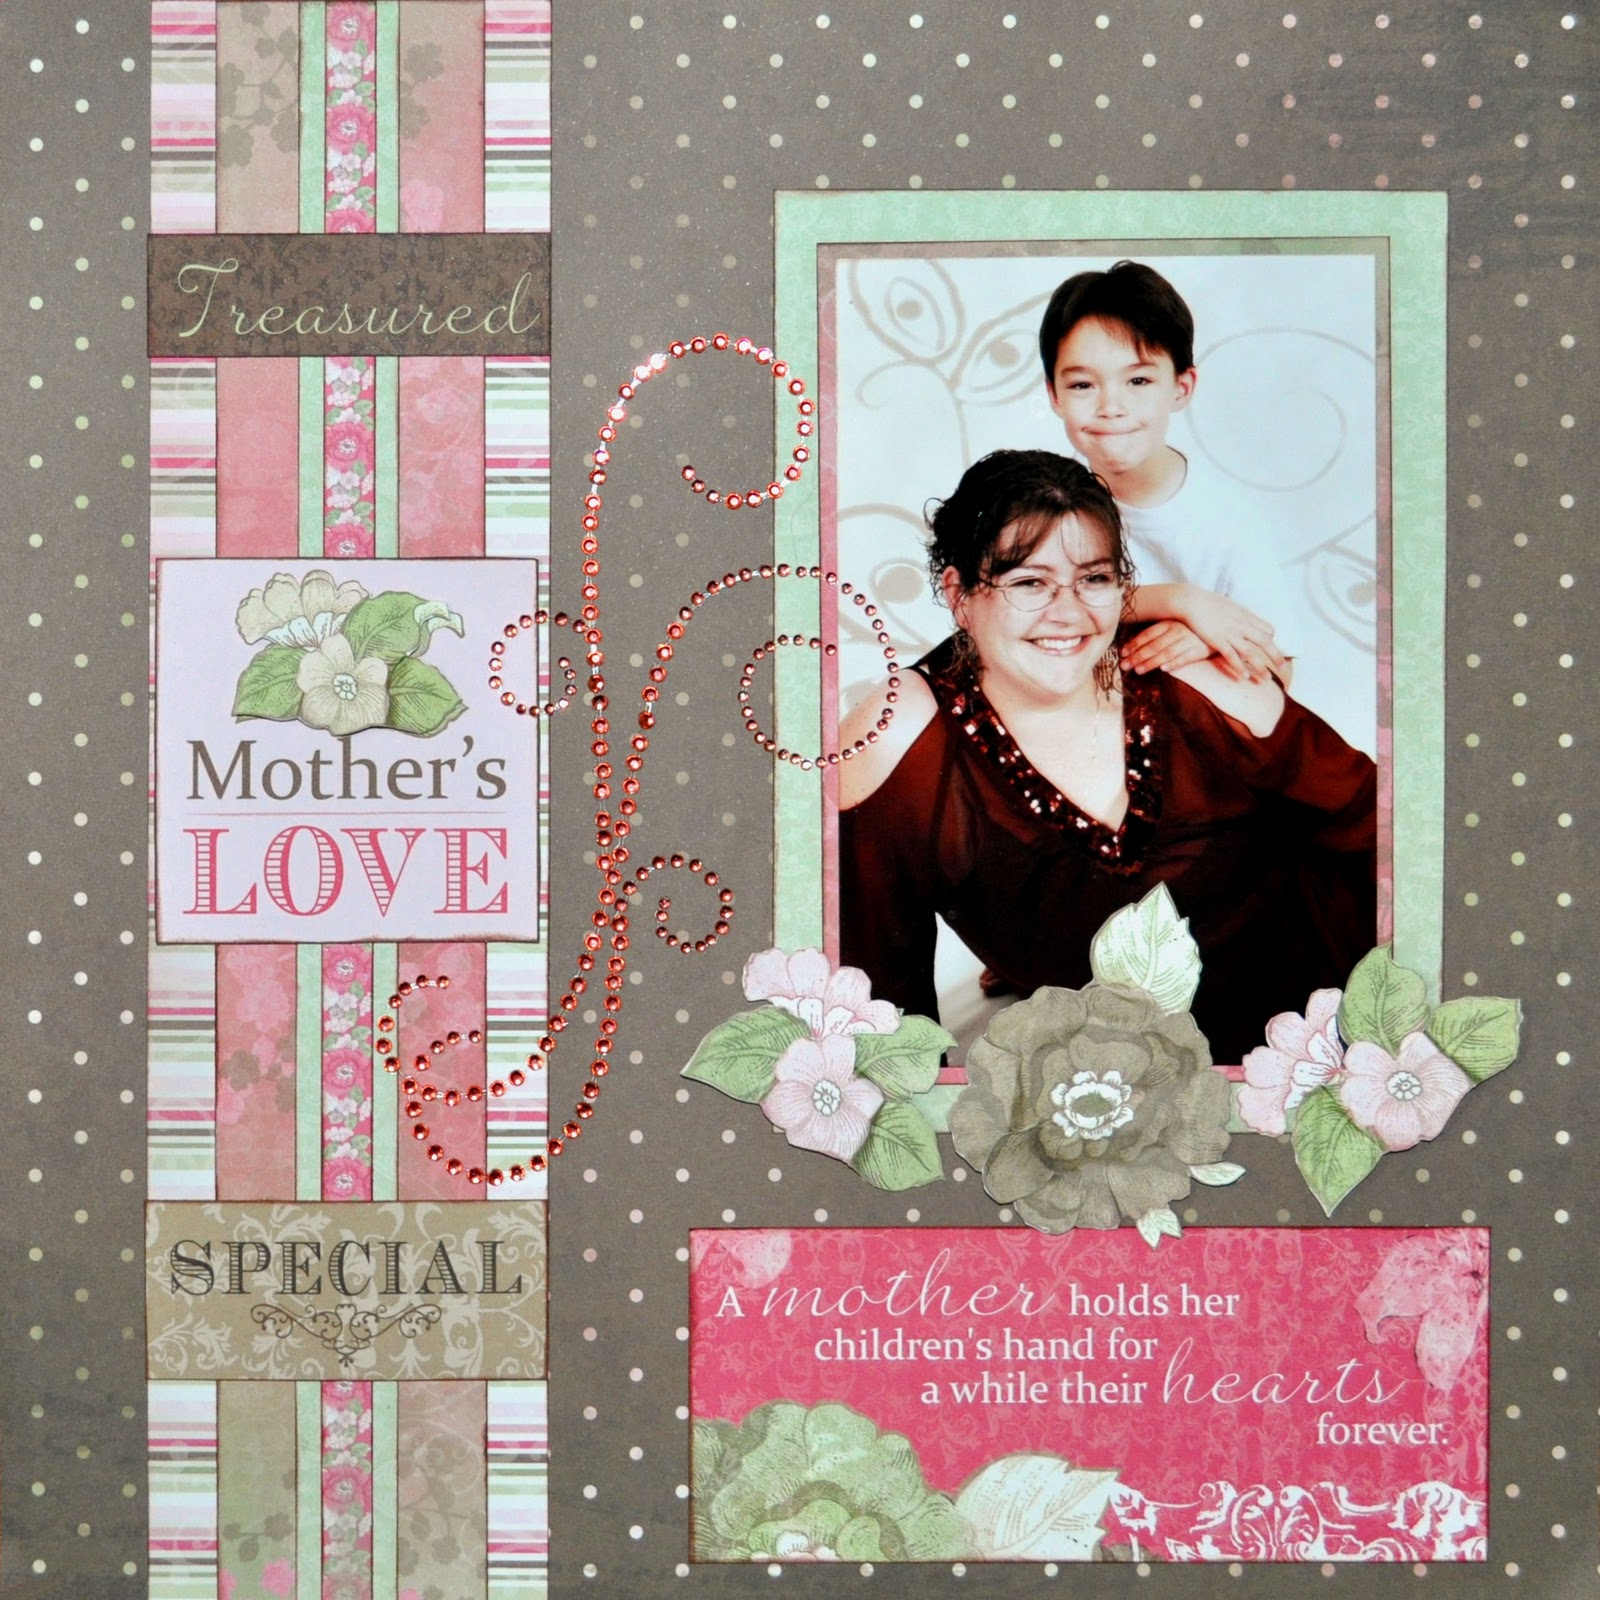
Measurements
Photo Size: 4 x 6 Inches Kaisercraft Papers: Chanteuse
Vivo: Background Sheet - 12 x 12 Inches.
Staccato: 3 x 12 Inches, 1 large brown flower with leaves and 2 medium pink blossoms with leaves
Eco: Photo Mat 1st: 5 x 7 Inches 2nd: 4.25 x 6.25 Inches 3rd: 2 x 12 Inches 4th: 0.5 x 12 Inches
Marcato: Treasured, Mothers Love, Special, A mother’s love quote
Layout Instructions
1. Trim Vivo to 12 x 12 Inches
2. Cut a 3 x 12 Inch strip from the bottom of staccato then cut out flowers.
3. From Eco Cut one 5 x 7 Inch piece, One 4.25 x 6.25 Inch piece, one 2 x 12 inch strip and one 0.5 x 12 inch strip.
4. Ink all edges then position them on the page as shown in the Layout photo.
5. Attach the Rhinestone flourish and flowers to your page.
School Days Layout
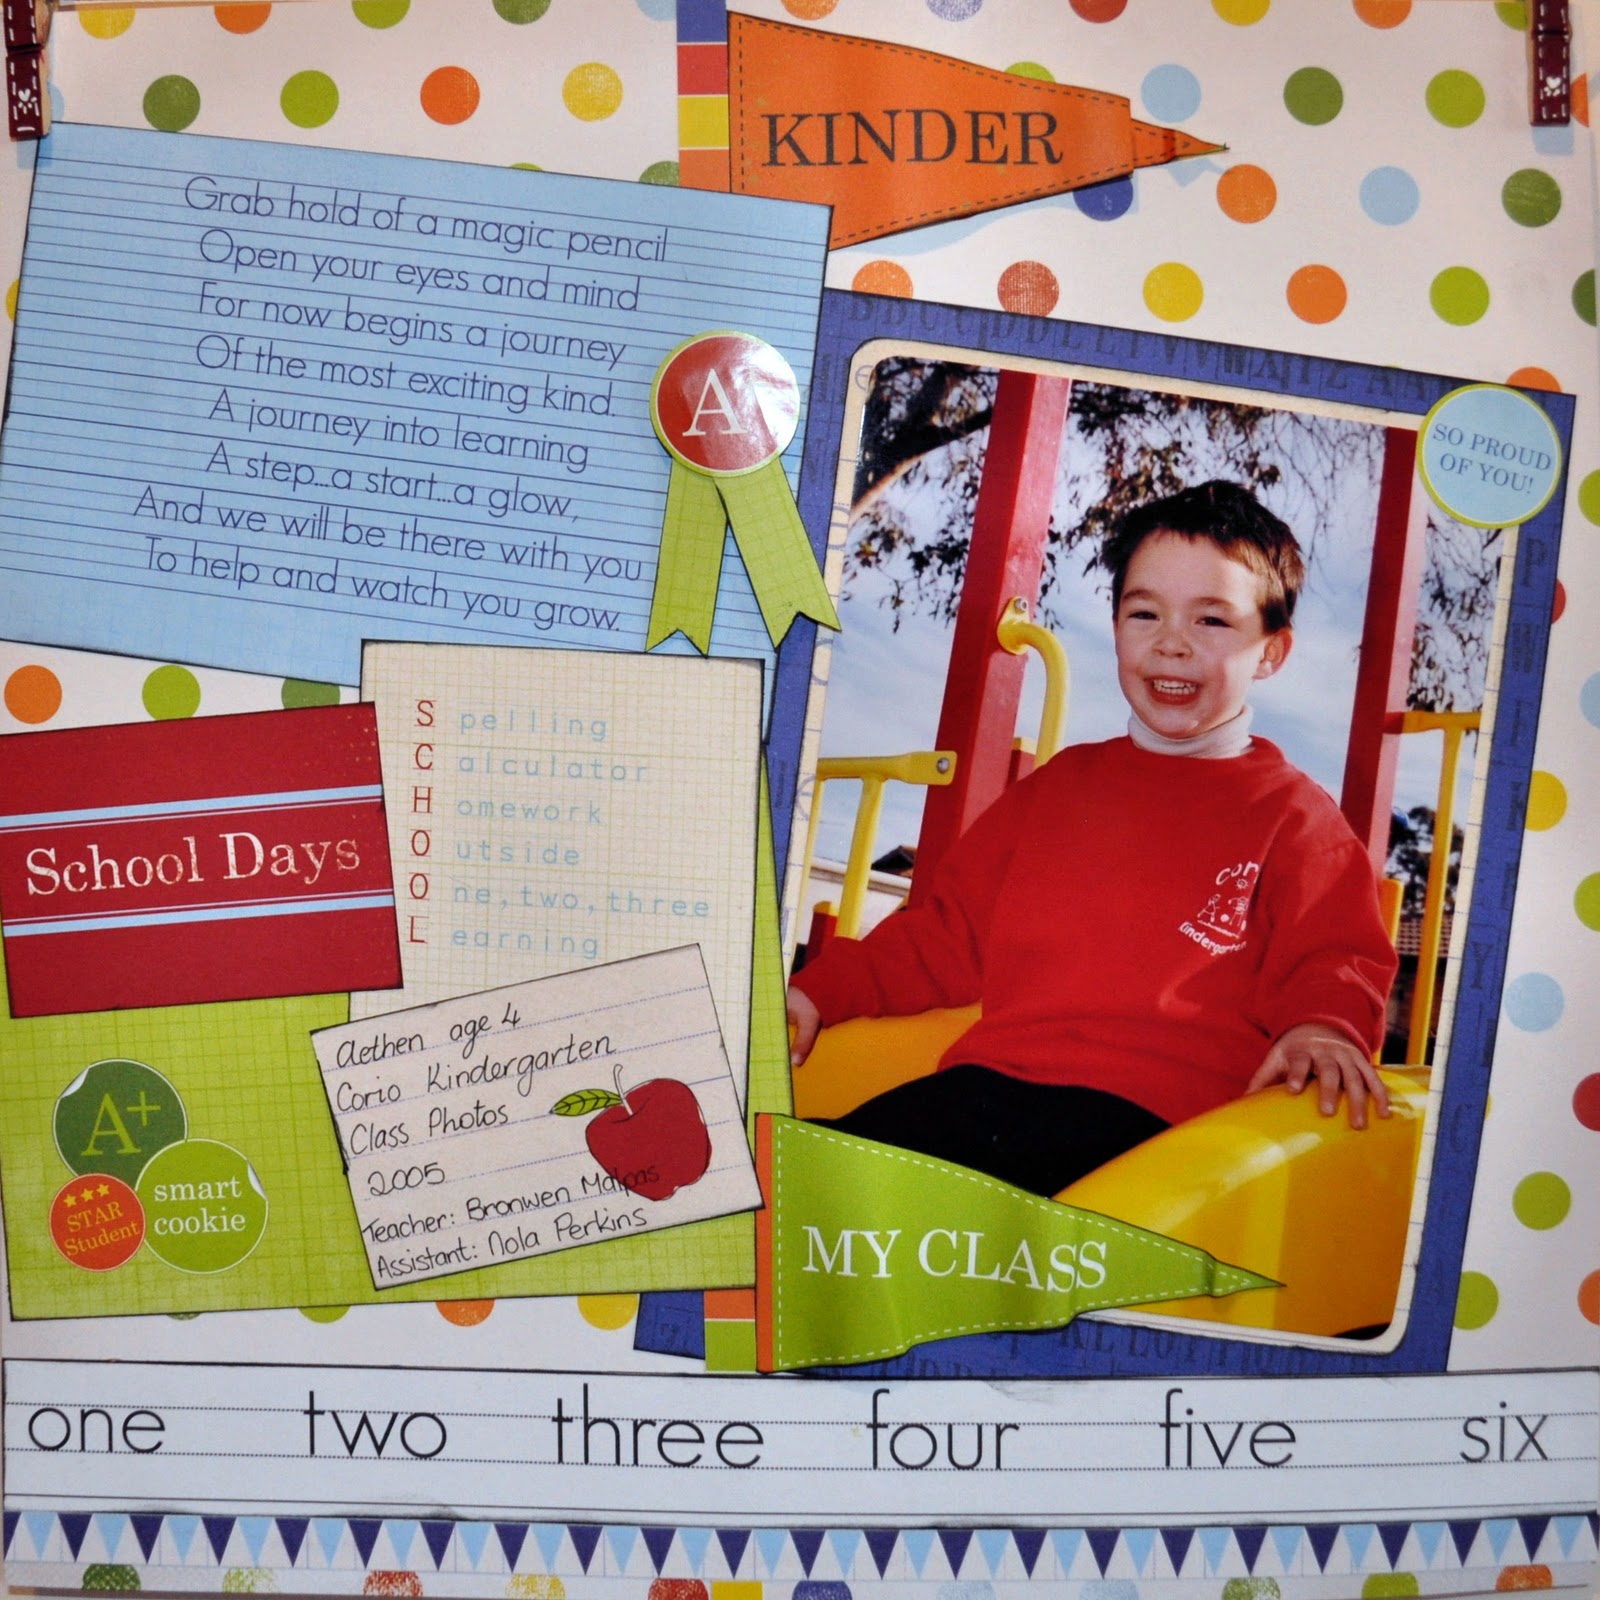
Instructions
Kaisercraft Paper Used: Class of 87
Times Tables: Background Sheet - 12 x 12 inches. Keep The Strip From The Bottom.
Book Week: 5 x 7 inches and 6 x 8 inches.
Excursion: Cut out all rectangles. Keep The Strip From The Bottom. Trim the apple piece to 2 x 3 Inches.
Sports Day: Cut out the appropriate flags eg. My Class and Kinder.
Cut out the numbered strip.
Book Week: 5 x 7 inches and 6 x 8 inches.
Excursion: Cut out all rectangles. Keep The Strip From The Bottom. Trim the apple piece to 2 x 3 Inches.
Sports Day: Cut out the appropriate flags eg. My Class and Kinder.
Cut out the numbered strip.
Cut out appropriate circles for the award ribbon and the photo corner.
Cut out the green check strip to use for ribbon.
1. Trim your photo to 4 ¾ x 6 ¾ inches.
2. Place the coloured squares strip down the centre of the page.
3. Mat your photo first with the small piece of Book Week (lined side facing up) then with the other piece of Book Week with the Blue side facing up, round off corners if desired.
4. Place the photo towards the bottom right of your page on a slight angle about a ½ inch from the bottom right side of the sheet.
5. Place the flags strip about a ¼ inch up from the bottom of the sheet.
6. Place the numbered strip directly above the flag strip.
7. Place the green rectangle with the circle award stickers towards the bottom left of the page on a slight angle about a ¼ inch above the numbered strip.
8. Place the blue poem piece on an angle at the top left side of your page approx
a ¾ inch from the top.
9. Place the SCHOOL poem overlapping both the Blue poem and the green piece.
10. Place the red School Days piece at the centre left side of your page overlapping the green piece and the school poem.
11. Place the apple lined piece below the SCHOOL poem and write some info about your photo.
12. Using the green check strip, cut two 2 ½ inch strips and make them into your ribbon award by attaching them to the back of one of your circle pieces with DS tape.
13. 3D this on your page using a foam dot.
14. Place the other circle over the top left corner of your photo.
15. Place your flags at the top and bottom of your page, or where ever you like!
Baby Boy

Photo Size: 5 x 7 Portrait
Kaisercraft Papers: Lullaby & Loire Valley
Black and Blue Flowers = Japonica
Die Cut Page = Cradle
Multi Page = Baby Shower
Plain Blue Page = New Arrival
For placement of all pieces please refer to the Layout Photo.
Keep the strips from the bottom of all pages.
1. Trim Japonica to 12 x 12 Inches
2. Trim Cradle to 4.5 inches from the right.
3. Trim New Arrival to 5.25 x 7.25 inches. (Photo Mat 1)
4. Trim Baby Shower as shown in image below.
a. Use #1 as your 2nd photo mat.
b. Fill out the info on #2 and trim around the outside of the solid blue border.
c. Use a 2.25 inch square scallop punch to punch out the verses on #4 and #5.
Die Cut Page = Cradle
Multi Page = Baby Shower
Plain Blue Page = New Arrival
For placement of all pieces please refer to the Layout Photo.
Keep the strips from the bottom of all pages.
Layout Instructions
1. Trim Japonica to 12 x 12 Inches
2. Trim Cradle to 4.5 inches from the right.
3. Trim New Arrival to 5.25 x 7.25 inches. (Photo Mat 1)
4. Trim Baby Shower as shown in image below.
a. Use #1 as your 2nd photo mat.
b. Fill out the info on #2 and trim around the outside of the solid blue border.
c. Use a 2.25 inch square scallop punch to punch out the verses on #4 and #5.

5. Trim the Before you were conceived strip as follows:
Before you were conceived, I wanted you,
Before you were born, I loved you,
Before you were an hour old, I would give my life for you,
This is the miracle of Love.
6. Ink edges of all pieces as desired.
7. Attach the Cradle piece (The side without the pram) to the left side of Japonica.
8. Attach New Arrival to #1 piece of Baby Shower to become your photo mat.
9. Attach your photo to the photo mat and adhere to page.
10. Attach #2 to #3 as shown in Layout Image on page 1 and adhere to page
11. Using foam tape or foam dots, attach the scalloped squares (#4 & #5) to the bottom of your photo as shown in Layout Photo
12. Ink the square bookplate wooden flourish using Antique Blue, then glue it to a leftover piece of baby shower. Write the name of the person in the photo and the date that the photo was taken. Trim around the edge so that no excess paper is showing and adhere to page.
13. Adhere the before you were conceived strip to page.
14. Attach some flowers to the page as desired to give it some dimension.
Airy Fairy
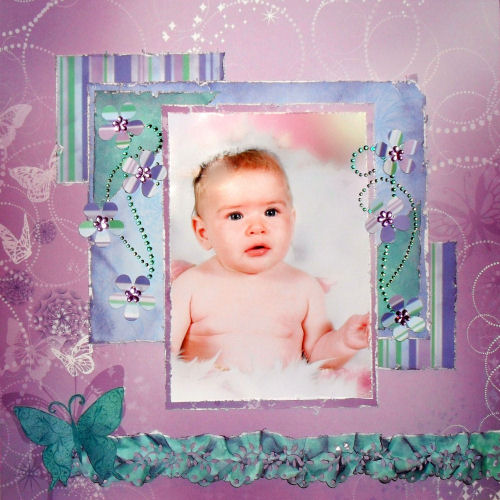
All measurements are in inches.
Kaisercraft Papers :
12" x 12" - Whimsy
6" x 8" - Whimsy
5 ¼ " x 7 ¼ " - Whimsy
3" x 4" - Fantasy
3" x 4" - Fantasy
3" x 3" - Fantasy
12" x 2.5" - Fantasy
1. Stamp a large butterfly on a leftover piece of fantasy and cut out
2. Cut your 3 x 3 inch square in half corner to corner to form two triangles
3. Using a border punch of your choice, punch along your 12 x 2.5 inch piece of paper and then tear along one edge.
4. Scrunch up your punched border piece, then flatten out and set aside.
5. Ink/shade and distress all sides of your paper pieces
6. Punch out seven flower shapes and set aside
7. Join all your paper pieces together as shown above
8. Attach your 5 x 7 photo as shown above
9. Attach Rhinestone swirls to each side of photo and attach flowers
Confidence

Measurements
Kaisercraft papers:
Dahlia: 1st Background Sheet - 12 x 12 Inches. (REVERSE SIDE)
Celandine: 2nd Background Sheet - 12 x 12 Inches. (REVERSE SIDE)
Celandine: Hidden journal piece x 2 @ 4 x 6 inches
Japonica: Photo Mat 5.5 x 7.5 inches
Angelica: Journal Mat 6.75 x 4.5 inches
Dahlia: Photo Mat 5.25 x 7.25 inches, Tag 2 x 3 Inches,
Stamped Verse Piece 2 x 4.5 inches & 2.25 x 4.75 inches
To make the small flower sprig
1. Carefully thread wire into puff paint and withdraw, then heat with heat gun to make it puff up. Once it is dry paint wire with a moss green and brown paint.
2. Curl wire around a pencil, carefully remove the wire then gently stretch it out.
3. Using hot glue gun or craft glue, loosely wind some sphagnum moss around the wire.
4. Using hot glue gun, attach your rose to the center of the sprig.
5. Bend wire to desired angle.
Layout Instructions
1. Trim Dahlia to 12 x 12 Inches
2. Cut around scalloped edge of Celandine.
3. Cut a 5.5 x 7.5 Inch piece from Japonica.
4. Cut a 5.25 x 7.25 inch piece and a 2 x 4.5 inch piece from a plain blue piece of Dahlia.
5. Cut a 2 x 3 inch piece and a 2.25 x 4.75 inch piece from the patterned piece of Dahlia.
6. Cut a 4.5 x 6.75 inch piece from Angelica.
7. Cut two 4 x 6 inch pieces from the lined side of 2nd sheet of Celandine.
8. Stamp the verse onto the 2 x 4.5 inch piece of Dahlia (plain blue).
9. Ink all edges of papers.
10. Attach the stamped verse to the 2.25 x 4.75 inch maroon piece of Dahlia.
11. Attach photo to 5.25 x 7.25 plain blue piece of Dahlia.
12. Attach the matted photo to the black side of Japonica.
13. Attach DS tape to the left, right and bottom sides of the matted photo piece.
14. Attach 4 x 6 inch pieces of Celandine to both sides of the 4.5 x 6.75 inch piece of Angelica.
15. Attach your matted photo to the center of the scalloped page.
16. Attach the stamped verse to the bottom right side of the page.
17. Cut the blue tab from the die cuts in half and attach one above your photo on the top right side about 1 inch in from the side then attach the other half to the hidden journal piece at the top on the right.
18. Cut the two blue triangle photo corners in half then attach to each corner of your photo using DS Tape.
19. Cut corners from the narrow side of your tag piece (2 x 3 inches).
20. Attach your flower sprig to the bottom left side of your photo piece.
21. Attach your tag under the flower sprig.
22. Attach your finished page to 12 x 12 inch sheet of Dahlia using foam tape.
Christmas Planner

Kaisercraft Papers:
Stocking
Ornament
Choir
Gift
Sleigh
Cutting Instructions
1. Cut two 9.25 x 4.25 Inch pieces from Ornament & Choir and one from Gift.
2. Cut one 3 x 9 inch piece from Ornament and Stocking.
3. Cut one 9 x 3.75 Inch piece from Gift (Make sure that Santa is in the bottom left corner of your piece.
4. Cut out the WE WISH YOU A MERRY CHRISTMAS verse from Sleigh.
5. Cut a 2 x 2.75 Inch piece from Choir
6. Cut out the red strip from Stocking
7. Ink all edges with Brown Ink
Assembly Instructions
1. Fold the manila folder in half then fold up 4.25 inches from the bottom
2. Have your manila folder so that the folded up side is facing you, then fold the left side into the centre and do the same with the other side. You should end up with 4 evenly spaced folds.
3. FRONT & BACK: Adhere 9.25 x 4.25 Inch piece from Ornament to the front, and then adhere
9.25 x 4.25 Inch piece from Choir to the back. Use a 0.5 mm double sided tape at the top and bottom to attach the red strip from stocking around the centre of the manila folder (Leave room in the centre of your strip to thread the ribbon through. Thread the ribbon through the strip then add the Santa piece in the centre of the front page. Attach the 2 x 2.75 inch piece of choir to the centre/top side of your front page then add the WE WISH YOU A MERRY CHRISTMAS verse to the 2 x 2.75 inch piece of choir using foam tape or foam dots.
4. INSIDE: Attach the 9.25 x 4.25 Inch pieces from Gift to the 1st section.
Attach the 9.25 x 4.25 Inch pieces from Ornament to the 2nd section.
Attach the 9.25 x 4.25 Inch pieces from Choir to the 3rd & 4th sections.
Next, add the 3 x 9 inch piece from Ornament along the bottom of the 1st & 2nd sections
Then add the 3 x 9 inch piece from Choir along the bottom of the 3rd & 4th sections
5. Decorate your planner with holly and gift tags.
One of a kind
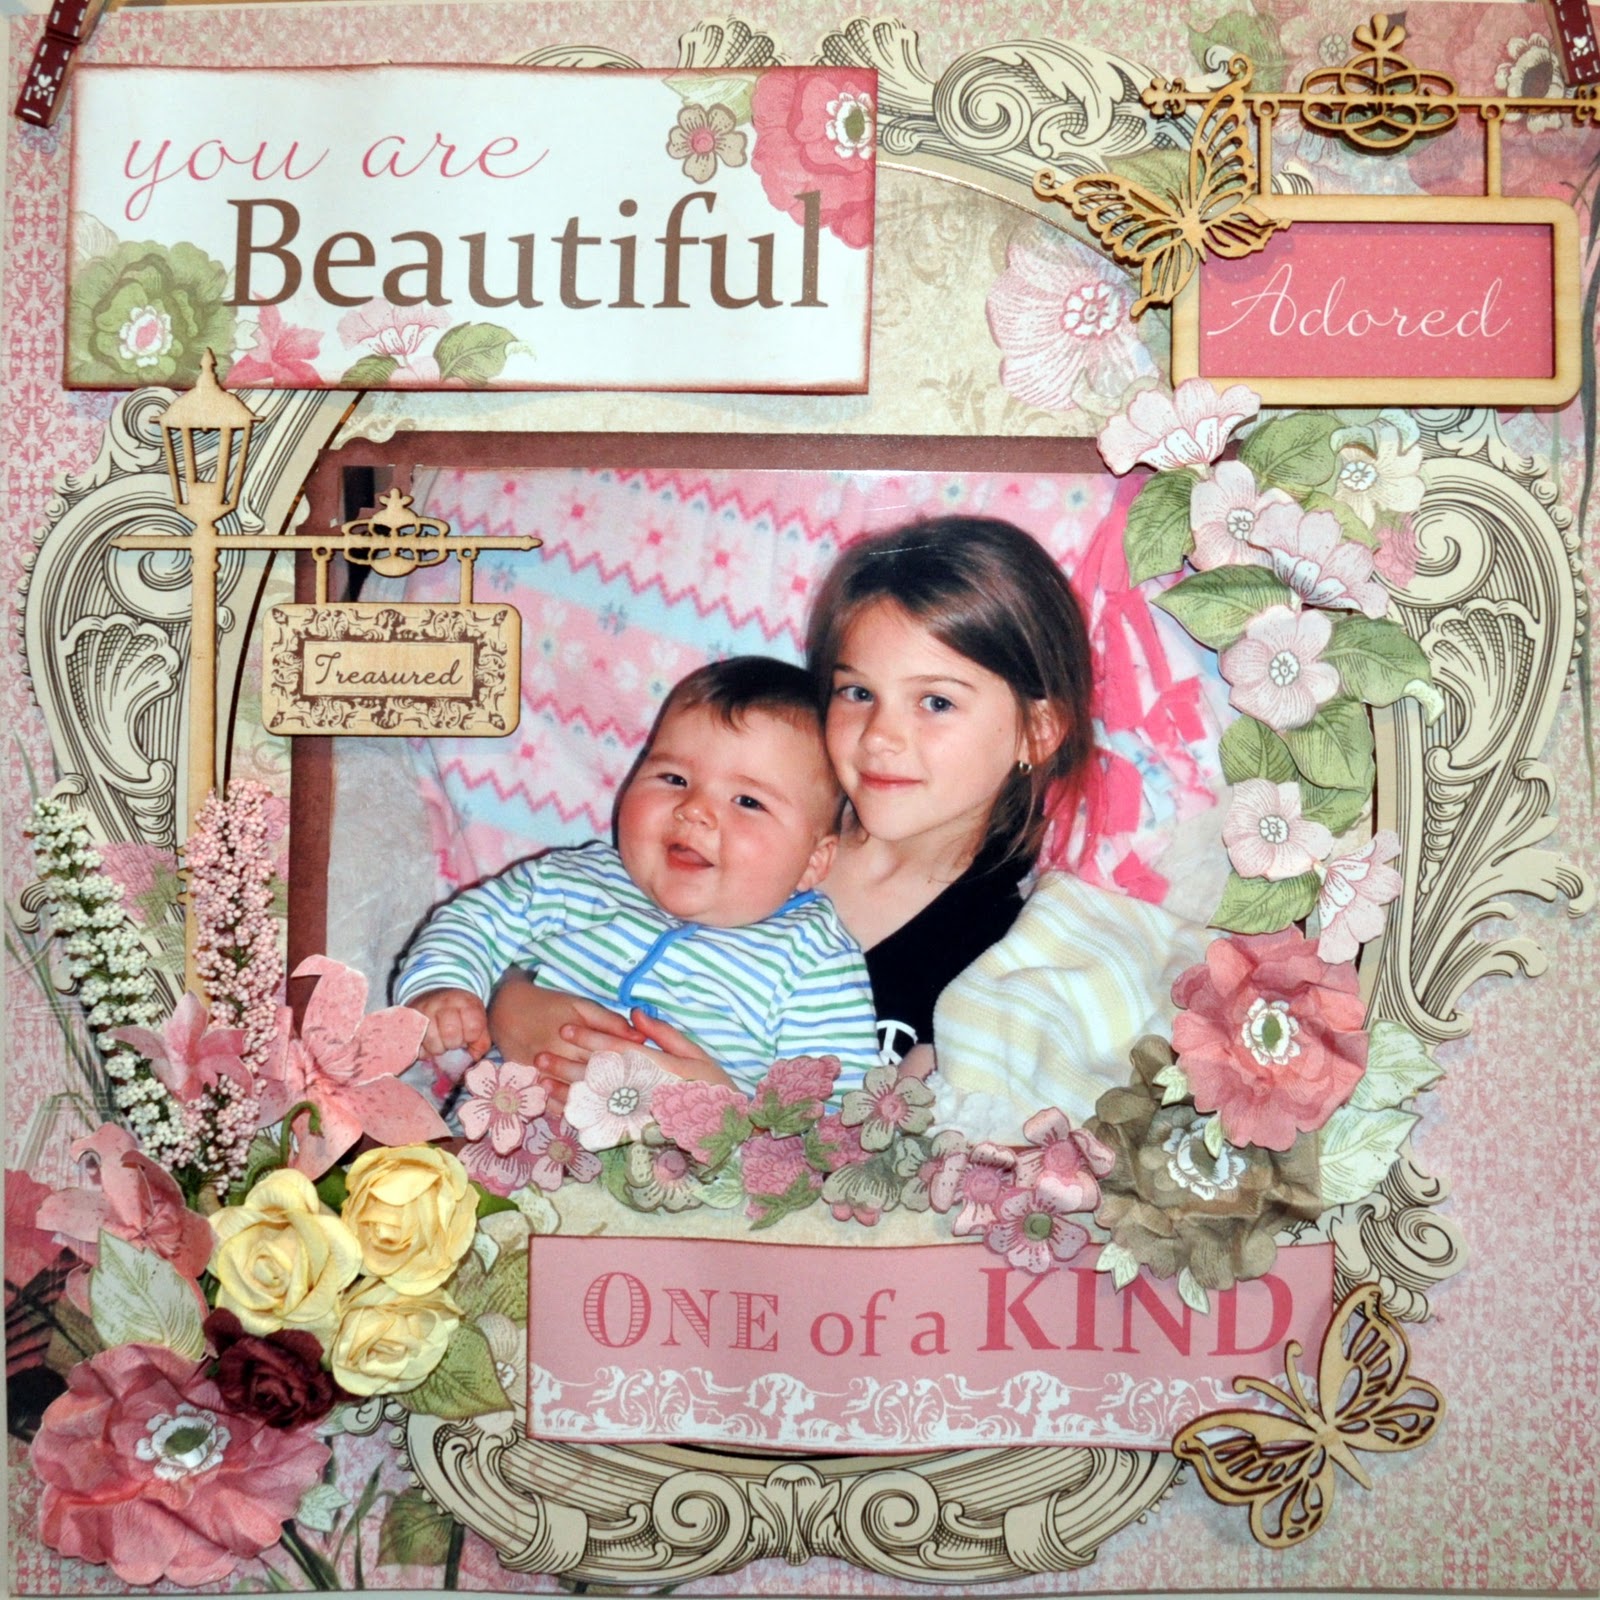
Photo Size: 5 x 7 Landscape
Kaisercraft Papers: Chanteuse
Bird = Con Brio
Die Cut Page = Rondo
Multi Page = Marcato
Maroon = Frieda
Flowers = Staccato
For placement of all pieces please refer to the Layout Photo.
Layout Instructions
1. Trim Con Brio to 12 x 12 Inches
Die Cut Page = Rondo
Multi Page = Marcato
Maroon = Frieda
Flowers = Staccato
For placement of all pieces please refer to the Layout Photo.
Layout Instructions
1. Trim Con Brio to 12 x 12 Inches
2. Cut out “One of a kind” & “You are Beautiful” from Marcato
3. From Staccato, cut 1 large pink rose, 1 small pink rose, 1 large brown rose, 2 lilies, 4 medium pink blossom clusters, 2 small blossom clusters, 1 brown blossom cluster and 2 berry clusters.
4. Ink all edges with Brown Ink
5. Attach Rondo to Con Brio with foam dots.
6. Trim Frieda to 6 x 8 Inches, and attach photo.
7. Attach photo piece to Rondo
8. Attach roses and posies to the lamp post by twisting the wire around the post
9. Attach the Lamp post wood flourish to the left of the photo using double sided tape.
10. Carefully scrunch and fold your cut out flowers to give dimension.
11. Attach the “One of a kind” & “You are Beautiful” pieces to your page.
12. Now attach all of your flowers around the photo and the lamp post as shown in layout picture.
Smile Burst
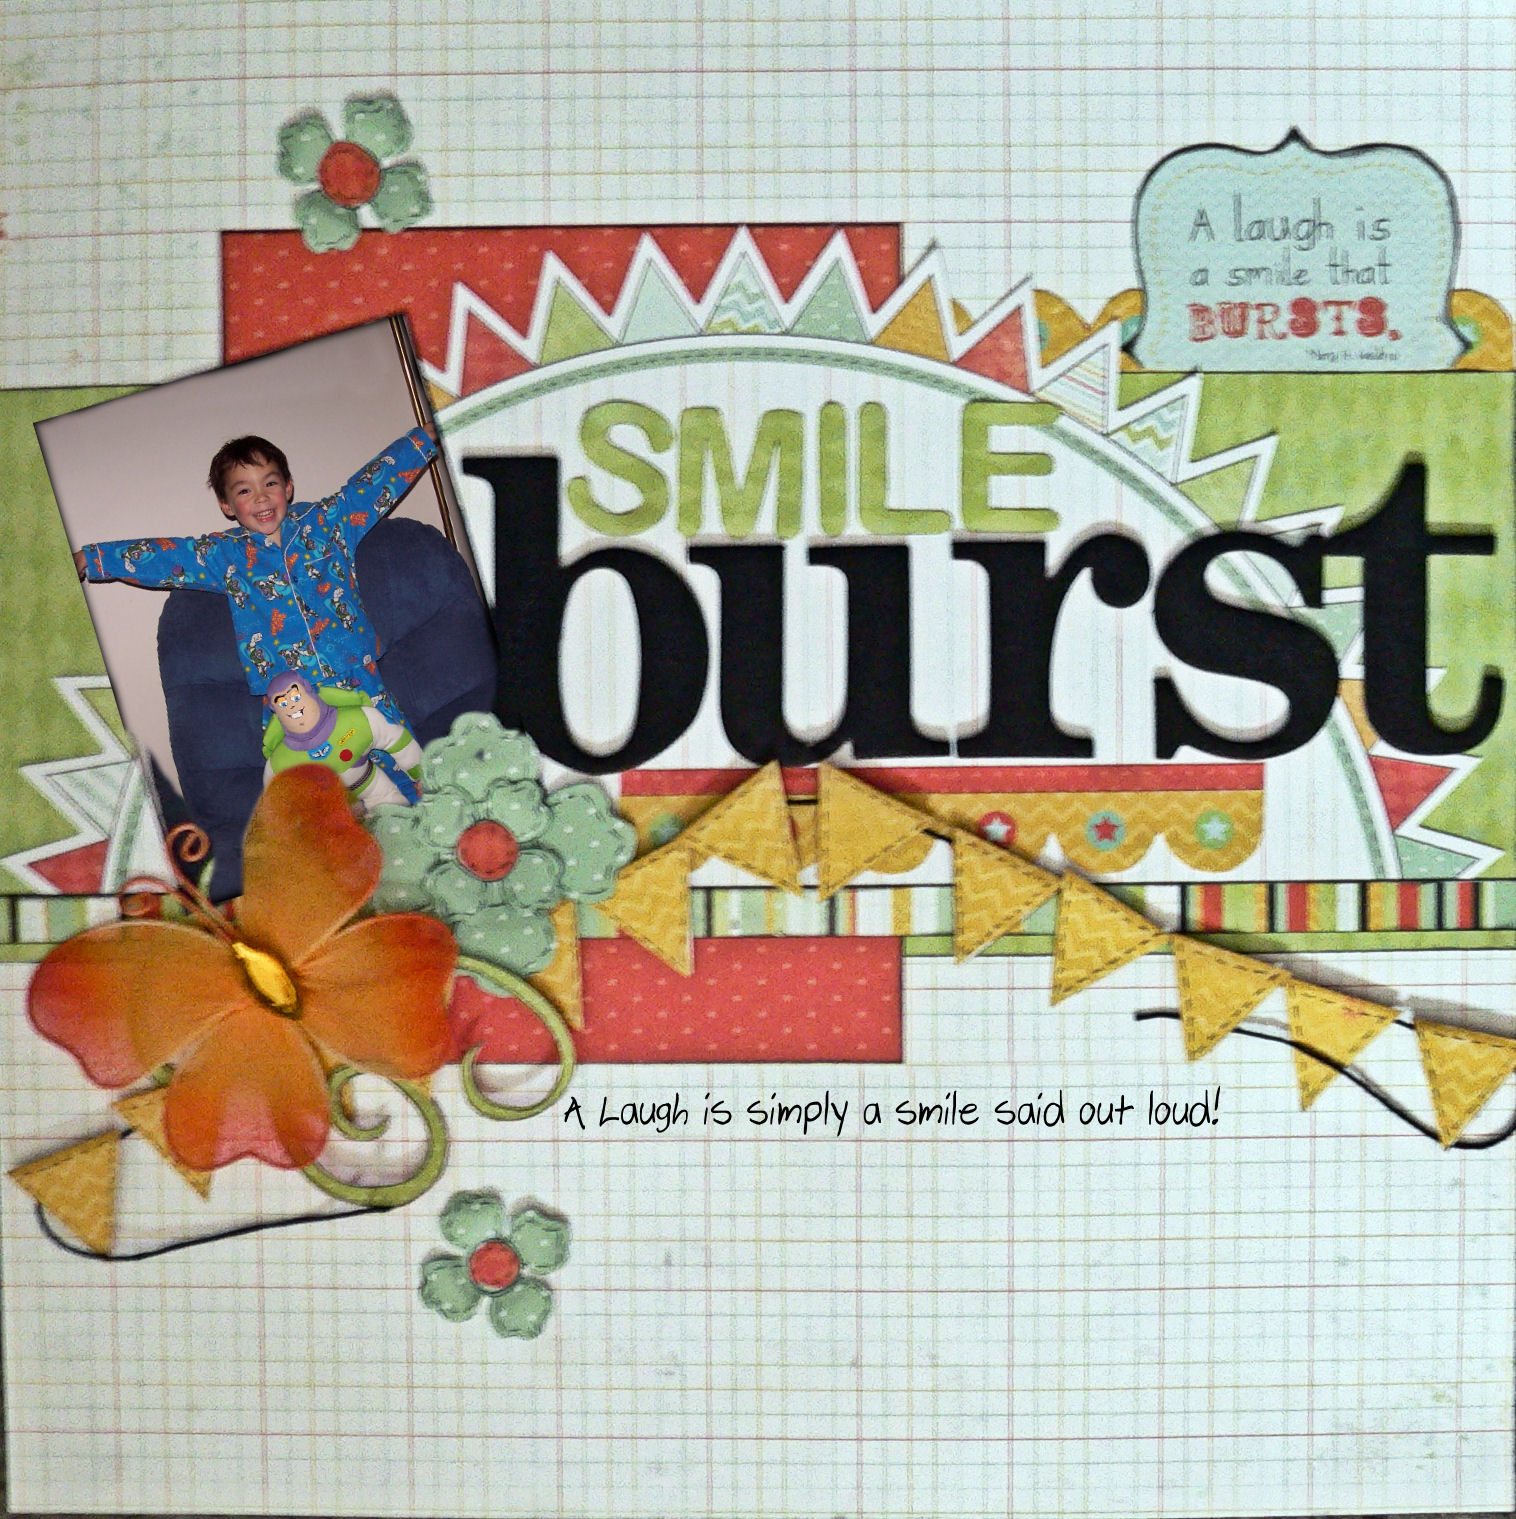
Photo Size: 3 x 4 Inch Portrait
Kaisercraft Papers:
Graph Paper = Woo-hoo
Die Cut Page = Tee-hee
Yellow dots = Yippee
Orange dots = Celebrate
Multi page = Bop!
Flowers = Hooray
Green diamonds = Jive
KEEP ALL STRIPS FROM THE BOTTOM OF YOUR PAGES!!
For placement of all pieces please refer to the Layout Photo.
Layout Instructions
1. Trim Woo-hoo to 12 x 12 Inches
2. Cut out “A laugh is a smile that bursts” & both of the scalloped borders from Bop!
3. Cut Jive to 4.5 x 12 inches.
4. Cut Tee-hee to 5.5 inches
5. Cut Celebrate to 5.5 x 6.5 inches
6. Cut 13 diamonds from Yippee to form flags.
7. Attach Jive to Woo-Hoo
8. Attach Celebrate over the top of Jive
9. Attach Tee-Hee to the centre of your page
10. Attach the striped strip to the bottom of Tee-Hee
11. Fold the diamonds in half to form flags, faux stitch around all the edges, then using double sided tape, attach your flags to the cotton. Attach the flags to your page using foam tape.
12. Attach flower petals to a small circle of paper scrap. Then attach to your page.
13. Cut three small circles from Celebrate and attach to the centre of your flowers.
14. Attach both of the cut out scallops to your page as shown in the photo on page 1.
15. Attach the “A laugh is a smile that bursts bracket frame over the top of the scallops as shown on page 1.
16. Attach your photo slightly under the large flowers.
17. Stamp flourish to Jive and cut out,
18. Attach to page then adhere the butterfly over the top.
19. Attach title as desired,
Kitchen Imps
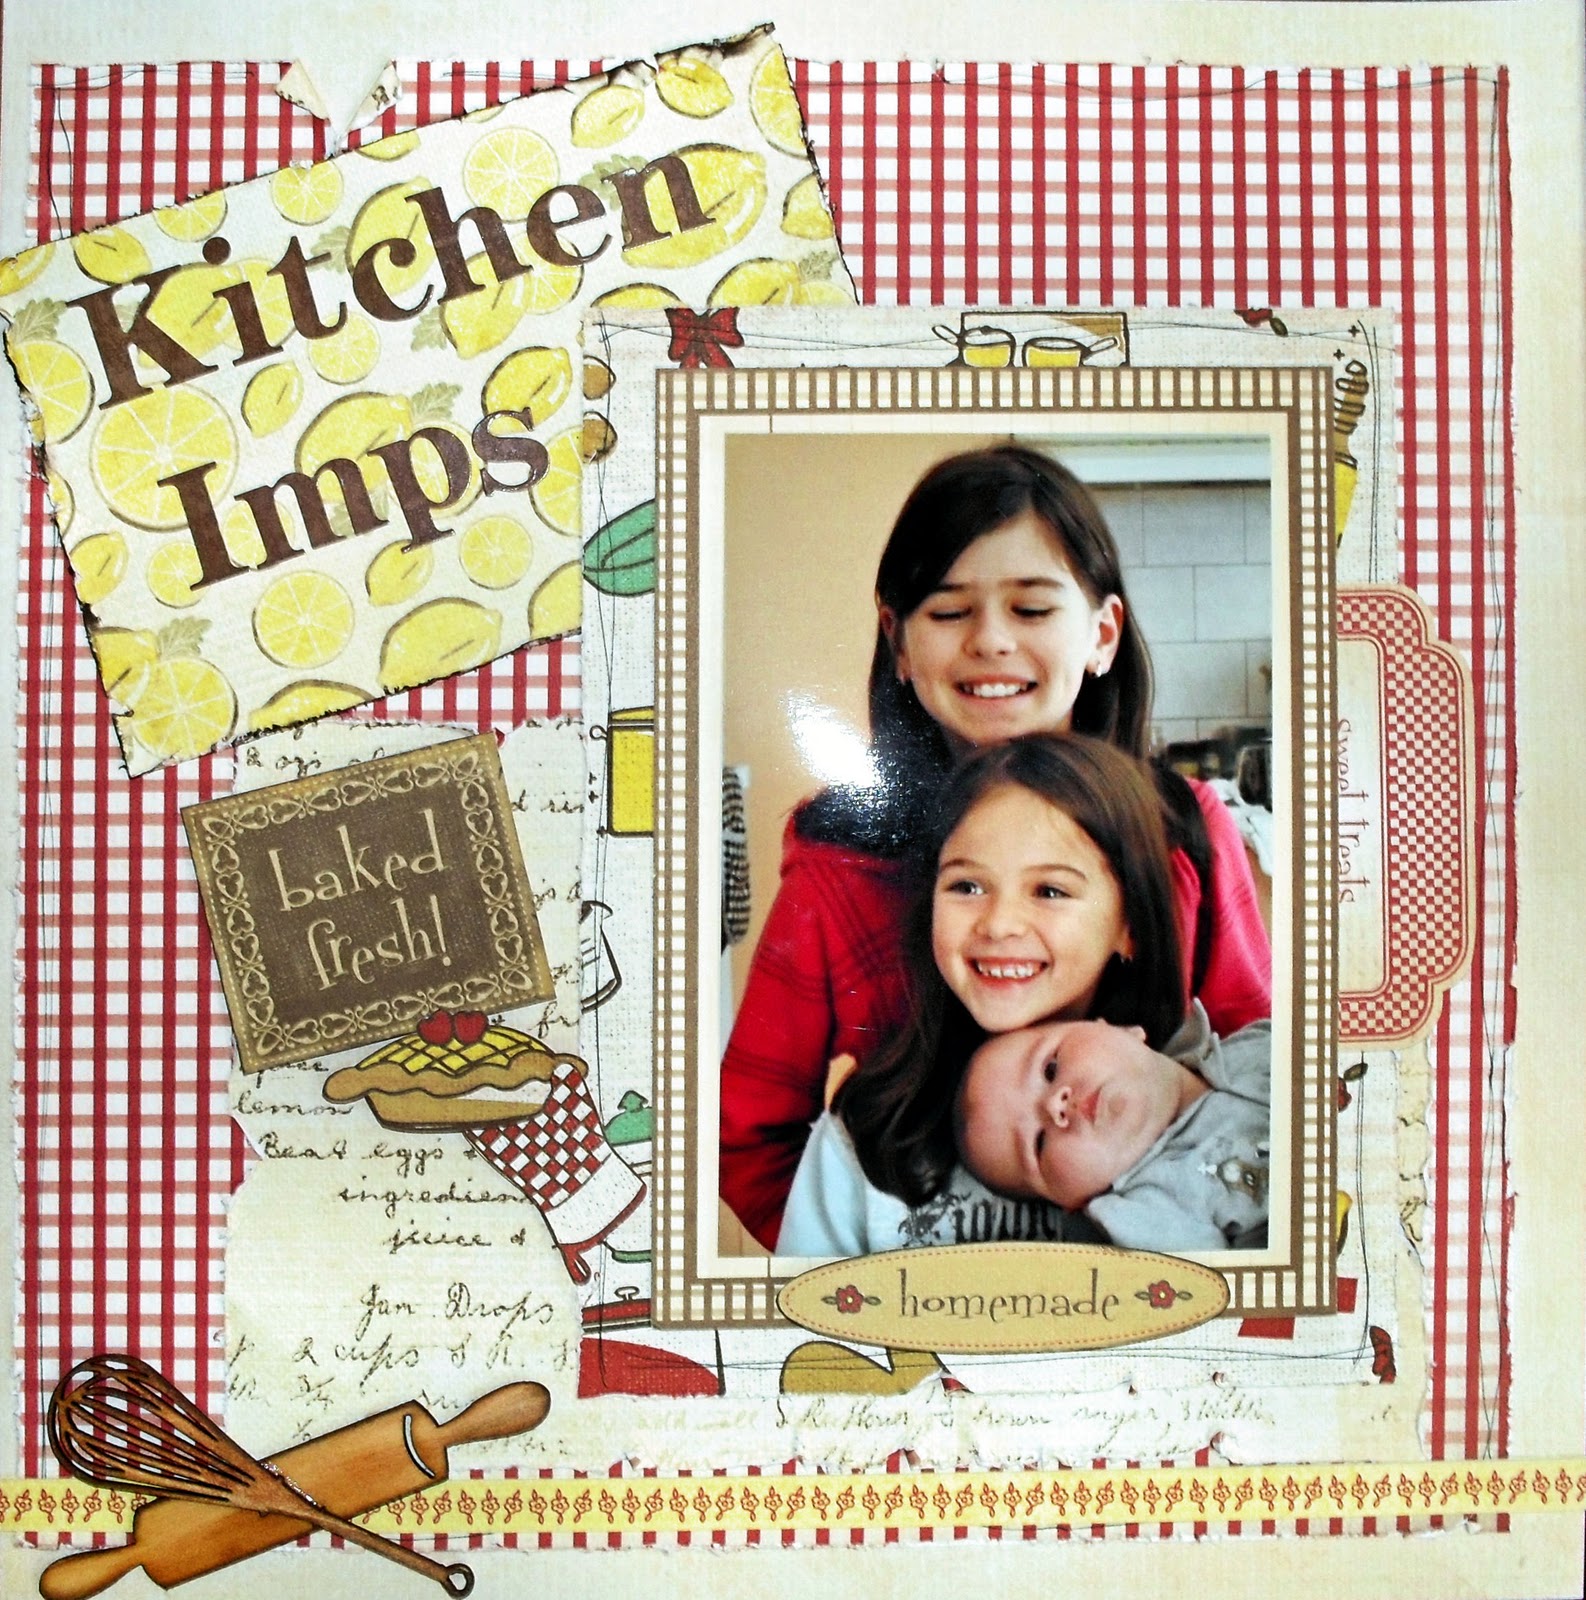
Instructions
Marmalade: Background Sheet - 12 x 12 Inches. (REVERSE SIDE)
Cookie Dough: 11 x 11 Inches 2nd sheet: - 5.5 x 9 Inches
Shortbread: 6 x 8 Inches
Lemon Slice: 4 x 6 Inches
1. Trim Marmalade to 12 x 12
2. Trim 1st sheet of Cookie Dough to 11 x 11 Inches.
3. From your 2nd sheet of Cookie Dough, cut a 5.5 x 9 Inch piece.
4. From Shortbread, cut out 1 oven mitt and 1 apple pie then trim the remaining piece to
6 x 8 inches
5. From Lemon Slice, cut out the sweet treats picture, the homemade picture and the baked fresh picture. Then trim the remaining piece to 4 x 6 inches.
6. Distress all the edges of your paper except the small cut out pictures, then ink with a brown or sepia ink pad.
7. Ink your wooden flourishes with a brown ink pad around the edges lightly working it towards the center then lightly go over both pieces with a sepia ink pad.
8. With DS tape attach the 11 x 11 inch piece of Cookie Dough to your backing sheet Marmalade with check pattern facing up.
9. Then attach the 5.5 x 9 inch piece of cookie dough to your sheet at the bottom right hand corner about 1 inch from edges with the writing facing up.
10. Now mat your photo with the recipe card, and then attach to the shortbread piece with the pattern facing up. DO NOT APPLY TAPE TO THE RIGHT SIDE OF THE RECIPE CARD!
11. Attach your 4 x 6 Inch piece of Lemon Slice to the top right corner of your layout on an angle as shown in the Image.
12. Attach your matted photo to your layout about 1.5 inches from the bottom right corner of your layout.
13. Attach the yellow/red flower strip from one of your pages to the bottom of your page as shown in above image.
14. Using foam dots attach your glove, apple pie, homemade and backed fresh pieces to your page then tuck your sweet treats piece in behind the recipe card.
15.Attach your wooden flourishes to your page using a small amount of craft glue then apply your desired title to the lemons piece and you are finished!
Purrrfect
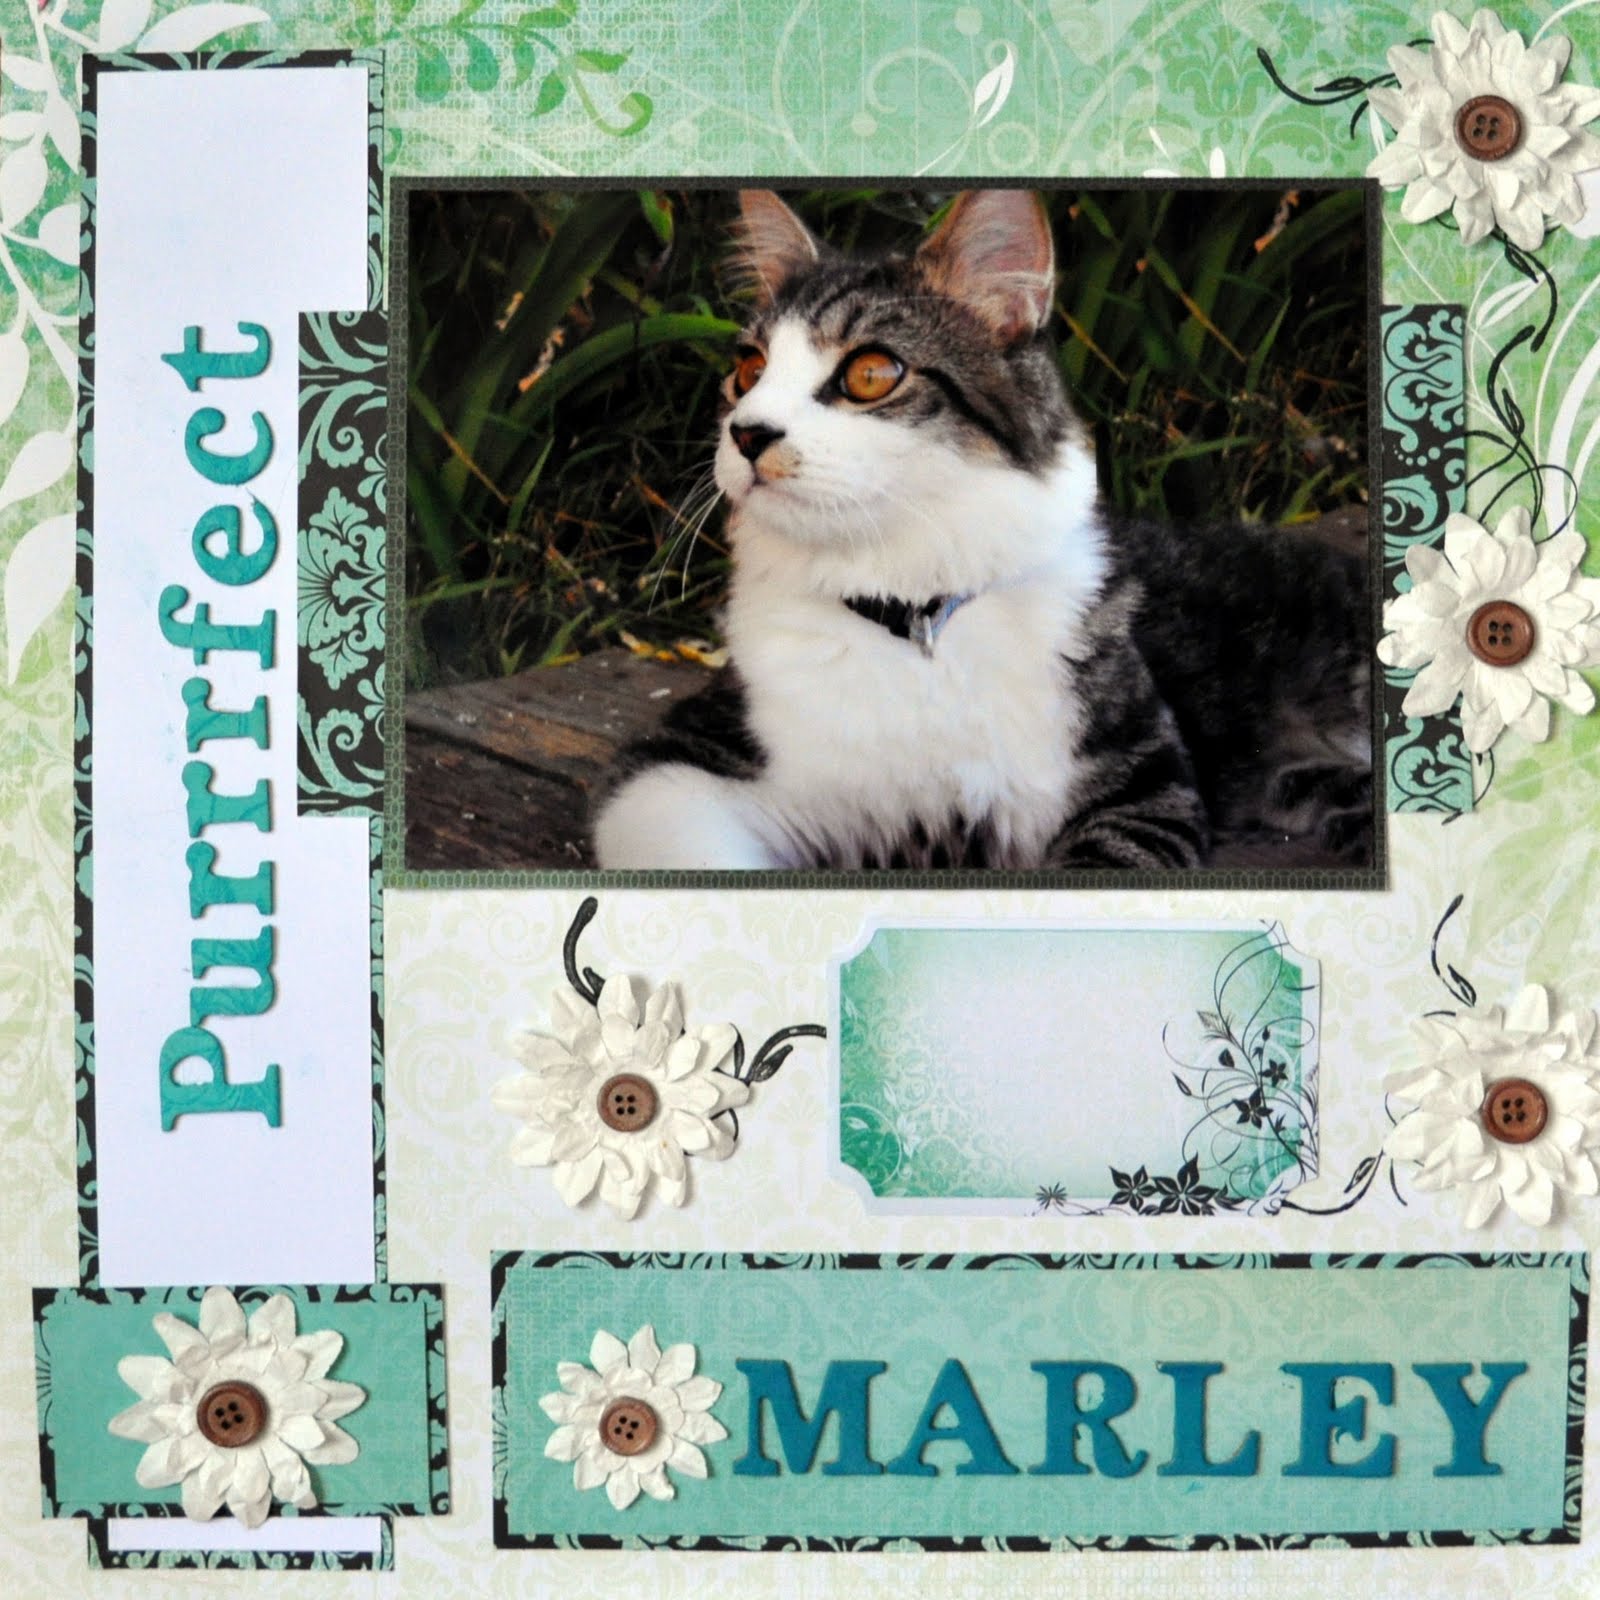
Photo Size: 5 x 7 Inch Landscape
Papers: Kaisercraft Flourish = Background Sheet (Pale Green)
Kaisercraft Beginning = Black and green borders and Green
Kaisercraft Afresh = Plain black & green
Layout Instructions
1. Trim Flourish to 12 x 12 Inches
2. Trim Beginning as follows:
1st Strip: 3.75 x 8.5 Inches
2nd Strip: 2.25 x 11.25 Inches
3rd Strip: 2.25 x 8 Inches
4th Strip: 1.75 x 3 Inches
5th Strip: 2 x 7.75 Inches REVERSE
6th Strip: 1.5 x 2.75 Inches REVERSE
3. Trim Afresh to 7.25 x 5.25 Inches
4. Plain white paper to 2 x 11 Inches
5. Lightly Ink your Title with Jade Ink.
6. Stamp your Title with Jade Ink.
7. Place your pieces as shown in photo.
8. Stamp flourishes as desired using black Ink
9. Attach flowers over the stamped flourishes
10. Attach buttons to flowers using glue dots
11. Attach Title and journal tag.
29 September, 2011

20 September, 2011


15 September, 2011
Surprise Christmas Card Class Friday 16th September
If I showed you photos it wouldn't be a surprise would it?
Ok, so I hate surprises.
Here are some photos.


Ok, so I hate surprises.
Here are some photos.


09 September, 2011
Best Wishes My Minds Eye Comp
I've only recently discovered the MME blog.......surprising considering how much I love their products......full of projects and inspiration........and they even have challenges there........for cardmakers and scrapbookers........so this month's card challenge is this sketch and the theme of friendship.


My Mind's Eye September 2011 Card Challenge
05 September, 2011

29 August, 2011


27 August, 2011


23 August, 2011

Subscribe to:
Posts (Atom)